

Façade and Curtain Wall Water Leakage: How to Diagnose and Fix the Root Cause
Façade leaks are diagnosed by mapping when and where water appears, ruling out non-façade sources, then reproducing the leak with controlled water tests: AAMA 501.2 nozzle testing for curtain walls and ASTM E1105 pressure-chamber testing for windows and walls. Test from the bottom up, isolate one joint at a time, and repair the proven path rather than re-sealing everything.

A façade leak is rarely where the stain is. Water that enters at a stack joint on the 12th floor can travel along a mullion, run down inside the frame and appear on a ceiling two floors below. That is why so many leak “repairs” in Singapore consist of sealant being added, again and again, wherever water was last seen, and why the leak keeps coming back.
Singapore’s climate makes the problem relentless. The Meteorological Service Singapore records a long-term mean annual rainfall of 2,113.3 mm with 171 rain days a year, thunderstorms most frequent in April, May and November, and Sumatra squalls that bring gusts of 40 to 80 km/h.1 Façades here are tested by wind-driven rain several times a month.
This guide explains how water gets through façades and curtain walls, the components that typically fail, how professional investigators reproduce a leak with recognised field tests such as AAMA 501.2 and ASTM E1105, where thermography fits, why root-cause repair beats patching, and how to protect warranties while you do it. For the broader repair process after a Periodic Façade Inspection, see façade defect rectification.
How water gets through a façade
Water needs two things to leak: an opening and a force to move it through. Façade design manages the forces as much as the openings.
| Force | How it moves water | Typical façade weakness |
|---|---|---|
| Gravity | Runs water down and inward through any downward-sloping path | Reverse-lapped flashings, flat sills, unsealed head joints |
| Kinetic energy | Drives raindrops directly into openings | Open joints facing prevailing wind, unprotected weep holes |
| Surface tension | Lets water cling to and travel along the underside of surfaces | Missing drip edges under sills, copings and soffits |
| Capillary action | Draws water into narrow gaps | Hairline cracks, tight laps, porous substrates |
| Air pressure difference | Pushes or sucks water inward when outside pressure exceeds inside | Air leaks at gasket corners, frame joints and stack joints |
The last force is the one that explains “it only leaks in storms”. Wind raises pressure on the windward face and lowers it inside the building, and water at any air leak is driven through. Facades that rely only on a perfect outer seal (face-sealed systems) are vulnerable to this; well-designed drained or pressure-equalised systems accept that some water passes the outer line and drain it back out through a cavity and weep holes.
Curtain wall and window systems: where they leak
- Stack and splice joints. In unitised curtain walls, the horizontal joints between units and vertical splices are critical; failed seals or misaligned units let water into the frame.
- Gaskets and seals. BCA lists loose gaskets and seals, deformed or dislodged capping, misaligned transoms and failed joints among the common curtain wall defects.8 Gasket shrinkage typically opens the corners first.
- Perimeter sealant. The joint between the façade frame and the surrounding structure is often the oldest, most exposed sealant on the building.
- Window sills and corners. Frame corner joints, blocked weep holes and sills without end dams are frequent paths in punched windows.
- Penetrations and attachments. Brackets, signboard fixings, air-conditioner supports and cable entries puncture the façade; each is a potential path.
- Transitions. Junctions between different systems, such as curtain wall to concrete, wall to roof, and parapet copings, are where responsibility and detailing are most often unclear.
Sealant and gasket failure modes
Sealant can fail in three ways: adhesive failure, where it peels from the substrate; cohesive failure, where the sealant itself tears; and substrate failure, where the surface it is bonded to breaks away. The mode tells you the cause: adhesive failure points to poor preparation, priming or incompatible materials; cohesive failure points to joint movement beyond the sealant’s capacity or ageing; substrate failure points to weak coatings or deteriorating backing material.
BCA’s 2026 PFI guidelines summarise research by the National University of Singapore on how a changing climate affects façade materials. Sealants and gaskets performed well overall, but gaskets require more frequent replacement; the research set performance thresholds for weather sealant (visual cracking per ASTM C793) and EPDM gaskets (changes in hardness, tensile strength and elongation).8 In practice, a gasket replacement programme should be part of any curtain wall maintenance plan.
Where sealant is structural, holding glass in place, the leak investigation becomes a safety question. ASTM C1401 is the standard guide for structural sealant glazing,6 and BCA’s PFI guidelines give de-glazing and sealant pull-out tests as examples of on-site tests for structural sealant glazing in a full façade investigation.8
Flashings and the details nobody owns
Flashings divert water out of the wall at heads, sills, copings, ledges and roof edges. Typical defects are reverse laps (upper piece tucked behind the lower), missing end dams that let water run off the end of a sill into the wall, flashings that stop short of the drip, and sealant used as a substitute for a lap. Air-conditioner ledges, planter boxes and roof-to-wall junctions concentrate water and deserve close attention.
Masonry, plaster and tiled walls
Water also moves through the wall itself: cracks in plaster, debonded tiles, porous grout and failed paint. BCA lists efflorescence on plaster and brick walls and bulging plaster among façade defects.8 Persistent wetting accelerates debonding of tiles and plaster and corrosion of embedded fixings, which is why leaks and Periodic Façade Inspection findings are so often related; see our PFI guide.
Rule out what is not the façade
ASTM E2128, the standard guide for evaluating water leakage of building walls, is aimed at buildings that already leak and deliberately excludes leaks from roofing, condensation, plumbing and open windows.4 Those exclusions are a useful checklist, because each is a common false lead:
Non-façade sources to rule out first
- Condensation: water on cold surfaces such as chilled-water pipes, ducts or glass in air-conditioned spaces, often worst in humid mornings.
- Air-conditioning drains: blocked or disconnected condensate pipes from fan-coil units and condensers.
- Plumbing: supply and waste pipes in walls and ceilings, including from units above.
- Roofs and gutters: roof outlets, gutters and parapet copings overflowing in heavy rain.
- Operable windows: windows left open or not fully latched.
- Wet trades: recent cleaning, washing of balconies or planter irrigation above.
A leak log tied to the weather is the single most useful diagnostic tool. Record date and time, location, rate, whether it was raining, and if possible the wind direction. A leak that appears only during rain from one direction is almost certainly the façade; a leak that appears on dry mornings is probably condensation or plumbing.
The investigation process
A disciplined leak investigation
- Collect documents. Façade shop drawings, as-built drawings, maintenance and repair history, previous inspection reports and warranty documents.
- Build the leak map. Plot every reported leak on floor plans and elevations, with the dates and weather from the leak log.
- Inspect from both sides. Survey inside for staining and damage, and outside for open joints, failed sealant, displaced gaskets, cracked glass and blocked weep holes.
- Form hypotheses. For each leak, list the likely entry points above and beside it, considering how water can travel inside the system.
- Plan the tests. Choose the method, the sequence of areas and the observation points inside; agree access and occupant notices.
- Test from the bottom up. Start at the lowest suspect location so water from a later test cannot be confused with an earlier one; mask adjacent joints to isolate each candidate path.
- Confirm and document. Record where and when water appeared, photograph the path, and if needed open up to see it.
- Repair the proven path, then retest. Use the same test to accept the repair.
Field test methods compared
Several published methods are used to reproduce leaks on site. They differ in what they simulate, what they need and what they can prove.
| Method | What it does | Best used for | Practical notes |
|---|---|---|---|
| AAMA 501.2 (nozzle / hose test) | Sprays water from a calibrated nozzle along joints of installed storefronts, curtain walls and sloped glazing, with an observer inside | Diagnosing leaks at specific joints of curtain walls and storefronts; quality checks of installed work | No chamber needed; isolates joints well; does not simulate air pressure difference |
| ASTM E1105 (chamber test) | Applies water spray to the outdoor face while a chamber creates a uniform or cyclic static air pressure difference | Windows, doors, skylights and curtain wall areas where wind-driven rain is suspected | Needs a sealed chamber on the interior or exterior; more representative of storms |
| AAMA 502 | Field test of newly installed windows and doors using a sealed chamber | Acceptance testing of new or replacement windows | Applies to newly installed products |
| AAMA 503 | Field test of newly installed storefronts, curtain walls and sloped glazing for air leakage and water penetration | Acceptance testing of new curtain walls | References ASTM E783 and ASTM E1105 |
| Infrared thermography | Maps surface temperature differences that indicate moisture or air leaks | Mapping the extent of wetting; locating anomalies to test | Supplementary; needs suitable conditions; BCA references TR 119:2024 |
| Moisture meters, borescopes, opening up | Measure or see moisture and conditions behind finishes | Confirming paths and damage | Opening up is definitive but disruptive |
Sources: Intertek on AAMA 501.2;2 ASTM on E1105;3 summaries of AAMA 502 and 503;5 BCA on thermography.89
AAMA 501.2 in practice
AAMA 501.2 is titled “Quality Assurance and Diagnostic Water Leakage Field Check of Installed Storefronts, Curtain Walls, and Sloped Glazing Systems”. As summarised by the testing body Intertek for the 2015 edition, it uses a specified nozzle type (B-25 #6.030) fed through a 3/4-inch hose with a control valve and pressure gauge, adjusted to about 30 psi at the nozzle; the nozzle is moved back and forth about one foot from the joint, perpendicular to the face, for five minutes for each five feet of joint, while an observer inside watches for leakage.2 Confirm the edition and parameters your specification calls for, since standards are revised.
Its strength is precision: one joint at a time can be wetted while neighbouring joints are masked. Its limitation is that it applies water without the pressure difference of a storm, so a leak that only occurs under wind may not reproduce.
ASTM E1105 in practice
ASTM E1105, “Standard Test Method for Field Determination of Water Penetration of Installed Exterior Windows, Skylights, Doors, and Curtain Walls by Uniform or Cyclic Static Air Pressure Difference”, applies water to the outdoor face and exposed edges while maintaining a static air pressure difference across the assembly.3 ASTM notes it may be used after a building is completed and in service to determine whether reported leakage is due to failure of the installed assemblies.3 Test pressures and durations come from the project specification or the standard; check which edition is referenced, as ASTM lists more than one.3
Thermography: a map, not a verdict
Thermography shows temperature differences on the surface. Wet materials cool or warm differently from dry ones, so thermal images can show where moisture has spread behind tiles or plaster, and air leaks can show as cold or warm streaks. BCA’s PFI guidance treats infrared thermography as a supplement to close-range inspection, requires approval from the Commissioner of Building Control for its use in PFI, and points to TR 119:2024 on qualitative inspection of building façades using infrared thermography.89 For leak diagnosis, use thermography to decide where to test, then prove the path with water.
Root cause versus patching
Patching treats the symptom where it is visible. Root-cause repair fixes the proven entry point and the reason it failed. The difference shows up in cost over time.
| Approach | What it looks like | Typical outcome |
|---|---|---|
| Patching | Sealant over existing sealant; sealant smeared over gasket corners; sealing weep holes “to stop water” | Leak moves or returns; drainage blocked; water trapped in frames; repeated mobilisation |
| Root-cause repair | Test, isolate, then repair the specific path with correct joint preparation, gasket replacement or flashing correction | Leak stops; repair verified by retest; record for warranty and future inspections |
Common patching mistakes deserve special mention:
- Sealing weep holes. Drained systems need weep holes to let water out. Sealing them traps water in the frame, which then finds a path inside.
- Over-sealing. New sealant applied over failed sealant bonds to the old sealant, not the substrate, and fails with it.
- Sealing the inside face. Interior sealant can hide a leak while water continues to soak the wall and corrode fixings.
- Fixing the wrong floor. Without testing, repairs follow the stain, not the path.
When joint sealant is replaced, adhesion of the new installation can be checked on site; ASTM C1521 is the practice for evaluating adhesion of installed weatherproofing sealant joints, and ASTM has revised it to add rolling-device techniques.7
Three rounds of sealant and a ceiling that kept staining
Composite scenario. Tenants on the 8th floor of an office building report ceiling stains after heavy rain. The landlord’s maintenance contractor adds sealant along the window perimeter on the 8th floor. Two months later the stain returns. The contractor re-seals the 9th floor windows. Then the 10th. After the third round, a façade consultant runs a leak log against weather records, finds the leak follows storms from one direction, and runs pressure-chamber and nozzle tests from the bottom up. The water enters at a stack joint on the 9th floor, runs down inside the mullion and exits above the 8th floor ceiling. The repair is a localised stack-joint reseal and gasket replacement. The avoidable costs: three rounds of access, damaged ceiling boards and carpet replaced twice, tenant complaints, and new sealant that later had to be removed because it blocked a drainage path.
Warranties, defects liability and records
Leak repairs often happen while a façade is still under a contractor’s defects liability period or a supplier’s warranty. Before repairing:
Protecting warranty and contractual positions
- Read the warranty: note conditions on approved materials, compatible products, authorised applicators and notice periods.
- Notify the original contractor or supplier in writing and invite them to attend testing.
- Use test methods named in the original specification where possible, so results are comparable.
- Photograph and record every test: location, method, duration, result.
- If a third party repairs under protest, keep the old materials removed and the test records.
- Check whether the defect falls within the defects liability period under your contract and how notice must be given.
How defects, variations and delay are handled under construction contracts is covered in our guides on variation orders and provisional sums and liquidated damages and extension of time.
What a good leak investigation report contains
Whether the investigation is done by a façade consultant, the professional supervising your repairs or the repair contractor, insist on a written record that someone else could follow. A useful report includes:
| Section | Content | Why it matters |
|---|---|---|
| Leak history | Leak log, locations on plans, dates, weather and wind direction | Links symptoms to exposure and rules out non-façade sources |
| System description | Façade type (face-sealed, drained, unitised, stick), materials, drawings reviewed | Explains how water is supposed to be managed |
| Visual findings | Photographs of joints, gaskets, flashings, weep holes, cracks, both sides | Shows candidate paths before testing |
| Test plan | Method (e.g. AAMA 501.2, ASTM E1105), parameters, sequence, masking, observers | Makes results repeatable and comparable |
| Test results | For each test: location, duration, result, time to first water, photographs | Proves the path rather than assuming it |
| Diagnosis | Confirmed entry points and why they failed (design, material, workmanship, age) | Determines whether to repair locally or replace a system |
| Repair specification | Method, materials, compatibility, preparation, extent | Prevents patching and protects warranties |
| Acceptance test | The retest that will confirm the repair works | Gives the owner an objective sign-off |
If the leak investigation is happening alongside a Periodic Façade Inspection, share the report with the Competent Person. Persistent water entry is often the cause behind PFI findings such as debonded tiles, efflorescence and corroded brackets, and BCA expects the PFI report to analyse the causes of defects classified as “Require Repair” or “Unsafe”.8
Singapore hotspots worth checking first
Certain details recur in leak investigations on Singapore buildings because of the way they are built and used:
- Air-conditioner ledges and condenser brackets. Ledges collect water and bracket fixings puncture the wall; BCA lists corrosion of air-conditioner brackets and fixings among common façade defects.8
- Bay windows and window hoods. Their tops and sills are horizontal surfaces exposed to driving rain, often finished with sealant rather than lapped flashings.
- Planter boxes and green walls. Irrigation adds water every day, not only in storms; BCA’s PFI scope includes green walls and their integrated water delivery systems.8
- Parapets and copings. Cracked copings let water into the wall head and down inside the façade.
- Exterior ceilings and soffits. BCA records that exterior false ceilings are prone to wetting and that water staining on ceiling boards is a common defect.8
- Window frames with ageing rivets and seals. Window leaks and window safety share root causes, as discussed below.
Windows: a special case
Leaking windows often have the same root causes as unsafe windows: failed fixings, worn parts and ageing seals. BCA’s window safety programme asks that aluminium rivets in casement windows be replaced with type 304 stainless steel rivets during retrofitting, and requires replacement windows to be installed by an approved window contractor or a GB1 or GB2 builder using a trained window installer.10 When a window is opened up for leak repair, check rivets, stays and fixings at the same time.
Access for testing and repair
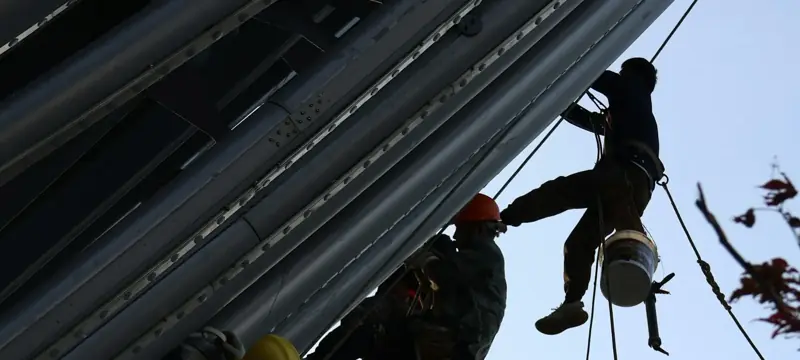
Water testing needs one team outside and one observer inside, often for several days across many locations. Rope access suits scattered test points on tall buildings because lines can be moved quickly; a gondola suits systematic testing along drops; MEWPs suit low-level canopies and storefronts. In occupied buildings, testing must be coordinated with tenants because water is deliberately applied and interiors must be watched. See rope access vs scaffolding vs gondola and working in live premises.
How RRD approaches this
Water-leak repair is part of RRD’s façade works at height, carried out by rope access alongside sealant and panel rectification. On leak jobs RRD begins with a site survey and an itemised quotation that lists cost-risk items, such as concealed defects that may only appear once joints are opened, before signing. Works are supervised on site and close with a joint inspection with the owner or the owner’s consultant. Details are on our façade works at height page.
Key takeaways
- Map leaks against weather before touching sealant; wind-driven leaks need pressure, not just water.
- Rule out condensation, plumbing, roofs and air-conditioning drains first.
- Use AAMA 501.2 to isolate joints and ASTM E1105 to reproduce wind-driven rain; test from the bottom up.
- Use thermography to map, not to prove.
- Repair the proven path with proper preparation, then retest; never seal weep holes.
- Protect warranties by notifying the original parties and documenting every test.
See the glossary for definitions, or contact us about a leak investigation and repair.
Questions people ask
What is the difference between AAMA 501.2 and ASTM E1105?
AAMA 501.2 is a field check that sprays water from a calibrated nozzle along joints of installed storefronts, curtain walls and sloped glazing, with an observer inside. It uses no air pressure difference. ASTM E1105 applies water to the outside of installed windows, skylights, doors or curtain walls while a chamber creates a static air pressure difference across the assembly, simulating wind-driven rain. E1105 is more representative of storms but needs a sealed chamber.
Why does my façade only leak in some storms?
Wind-driven rain changes the pressure across the façade and pushes water through gaps that stay dry in still rain. In Singapore, Sumatra squalls bring gusts of 40 to 80 km/h, and wind direction varies between the monsoon seasons. A leak that appears only in certain storms usually points to an opening that needs both water and pressure, such as a joint, gasket corner or window sill, and suggests a pressure test may be needed to reproduce it.
Can thermography find façade leaks?
Infrared thermography can show wet areas because moisture changes surface temperatures, and it is useful for mapping the extent of wetting behind finishes. It does not by itself prove the entry point. BCA treats thermography as a supplement in façade inspection and references Technical Reference TR 119:2024 for its use. A controlled water test is still needed to confirm the path.
Should we just re-seal the whole façade?
Usually not as a first step. Blanket re-sealing is expensive and may not address the actual path if water enters through gaskets, flashings, frame corners or the wall behind. Diagnose first, then repair the proven defect. If testing shows sealant has failed widely, a planned full replacement with proper joint preparation may then be justified.
Can a leak be something other than the façade?
Yes. ASTM E2128, the standard guide for evaluating water leakage of building walls, deliberately excludes leaks from roofing, condensation, plumbing and open windows, because these are common and are often mistaken for wall leaks. Check air-conditioning drains, pipes, roof outlets and condensation on cold surfaces before testing the façade.
Will a third-party repair void our curtain wall warranty?
It can. Many façade and sealant warranties are conditional on approved materials, compatible products and authorised applicators. Before repairing during a warranty or defects liability period, read the warranty, notify the original contractor or supplier in writing, and invite them to attend testing. Keeping test records protects both the claim and the repair.
Who should carry out leak testing?
Testing should be planned by someone who understands the façade system, such as a façade consultant or the professional overseeing the repairs, and carried out by a team that can access the façade safely and observe from inside. The test method, sequence and results should be documented with photographs so that the repair addresses what was proven.
Sources
10 sources. Official sources are marked dark. Links were checked when this guide was last updated.
- weather.gov.sgMeteorological Service Singapore — “Climate of Singapore”. https://www.weather.gov.sg/climate-climate-of-singapore/ (accessed Nov 2026) ↩
- intertek.comIntertek — “AAMA 501.2: Quality Assurance and Diagnostic Water Leakage Field Check of Installed Storefronts, Curtain Walls, and Sloped Glazing Systems”. https://intertek.com/building/standards/aama-501-2 (accessed Nov 2026) ↩↩
- store.astm.orgASTM International — ASTM E1105, “Standard Test Method for Field Determination of Water Penetration of Installed Exterior Windows, Skylights, Doors, and Curtain Walls by Uniform or Cyclic Static Air Pressure Difference”. https://store.astm.org/e1105-15.html and https://www.astm.org/Standards/E1105.htm (accessed Nov 2026) ↩↩↩↩
- astm.orgASTM International — ASTM E2128, “Standard Guide for Evaluating Water Leakage of Building Walls”. https://www.astm.org/Standards/E2128.htm (accessed Nov 2026) ↩↩
- cx-associates.comCX Associates — “AAMA 503” and “AAMA 502” enclosure testing summaries. https://www.cx-associates.com/enclosure-testing/aama-503 and https://www.cx-associates.com/enclosure-testing/aama-502 (accessed Nov 2026) ↩
- astm.orgASTM International — ASTM C1401, “Standard Guide for Structural Sealant Glazing”. https://www.astm.org/Standards/C1401.htm (accessed Nov 2026) ↩
- astm.orgASTM International — “Proposed New ASTM Standard to Facilitate Use of Rolling Devices for Waterproofing Sealant” (on ASTM C1521). https://www.astm.org/news/press-releases/proposed-new-astm-standard-facilitate-use-rolling-devices-waterproofing-sealant (accessed Nov 2026) ↩
- isomer-user-content.by.gov.sgBuilding and Construction Authority — “Guidelines on Periodic Façade Inspection”, Version 1.3, September 2026, sections 6.3, 7, 9.2 and 9.4. https://isomer-user-content.by.gov.sg/338/51a06852-15e6-4a07-936c-2fa211f8c928/PFI%20Guidelines_V1.3.pdf (accessed Nov 2026) ↩↩↩↩↩↩↩↩↩↩
- isomer-user-content.by.gov.sgBuilding and Construction Authority — “Periodic Façade Inspection (PFI) FAQs”, Q32–Q33. https://isomer-user-content.by.gov.sg/338/4f099ad5-3a38-434f-9b81-0a52da31ba91/pfi-frequently-asked-questions.pdf (accessed Nov 2026) ↩↩↩
- bca.gov.sgBuilding and Construction Authority — “Windows Safety”. https://www1.bca.gov.sg/safety-and-standards/periodic-building-inspections/windows-safety/ (accessed Nov 2026) ↩
Use this guide in a report, a tender or a by-law briefing. Please link to the page so readers get the current version.